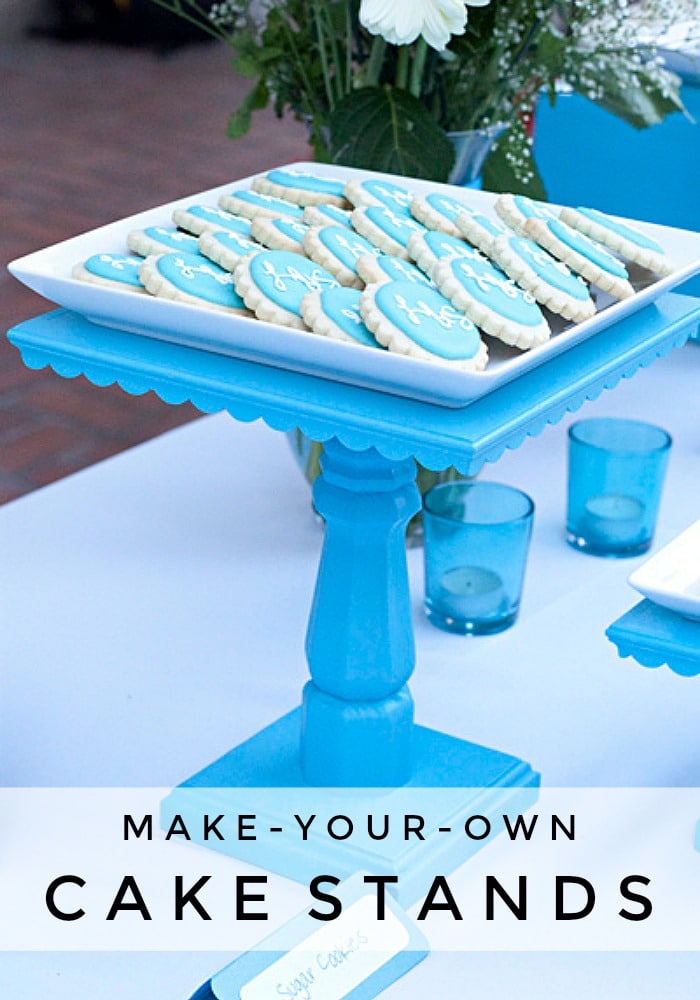
Making your own cake stands is an affordable alternative for your next party or celebration!
My little (6’4″) bro got married last summer, and his sisters, who act mostly like his mother, planned a little “open house” in honor of the happy couple. We really had no idea what we were doing – we’ve never done this before! But we wanted to make our brother happy, and we wanted to make our mom proud. (Because we know she would have made it beautiful!)
The entire open house turned out lovely, if I do say so myself, and I am excited to share one of the fun projects we made for it – Pedestal Cake Stands.
I love cake stands. I wish I had 500 in different shapes and sizes… but I don’t. And finding a bunch of cake stands that matched and were also affordable would prove to be quite the task! Luckily I’m married to a handy husband who likes to make my crazy visions a reality… most of the time. Once we decided to make them together (yes, I helped!), it all came together quite nicely! Here is how we did it:
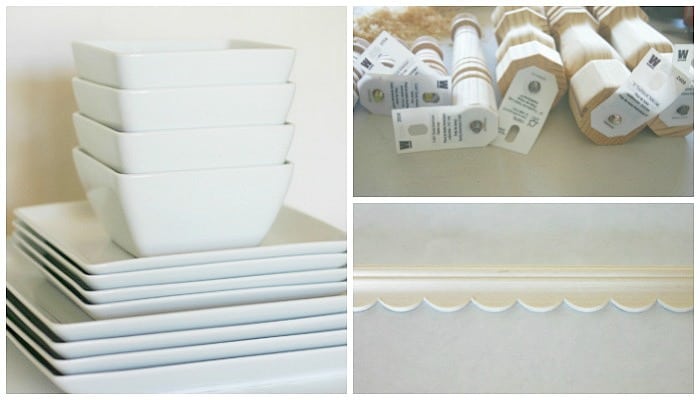
MATERIALS –
- smooth, thin plywood – for the tops
- 1″ pine – for the base
- thin trim*
- dinner and salad plates (I just used the white ones I already had!)
- wood table legs with screws attached
- power tools – saw, router, screwdriver, miter saw, pin nailer, sander
- screw – we used a 1.5 inch screw
- paint
- paint brush
*Home Depot only had a few basic trims to choose from in this thin size, so I found the trim I used at Michael’s. I think it’s meant for dollhouses, but now it is meant for me.
DIRECTIONS –
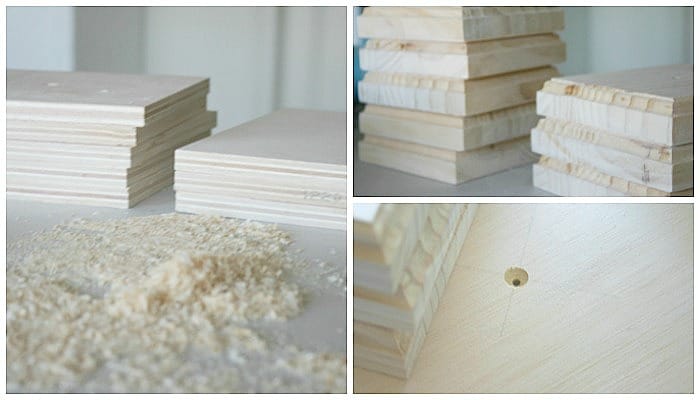
- Measure your plywood to be a little bigger than the bottom of the plates you plan to use and cut it.
- Cut your pine into squares – however big you’d like you base to be. Finish the edges with a router. (We used a 3/16 ogee router bit for ours.)
- Screw the wood table legs into the base by first drilling a small hole in the center of the pine and twisting the legs into the hole.
- Find the center of your plywood rectangles (the tops) and drill a hole using a countersink bit. Attach the plywood top to the stand with a 1.5 inch screw.
- Cut your moulding at 45 degree angle’s with the miter saw. Attached the trim with wood glue and a pin-nailer.
- Fill the nail holes with wood putty and sand away! NOTE: I decided not to fill and sand the top hole because this way I could unscrew these cake stands and store them so much easier. (You know how much I despise the thought of having one more thing to store!) Plus, the tops would be covered by the plates, so you wouldn’t even see the screw anyway!
- Paint your cake stands and you’re good to go!!!

Aren’t they so pretty?
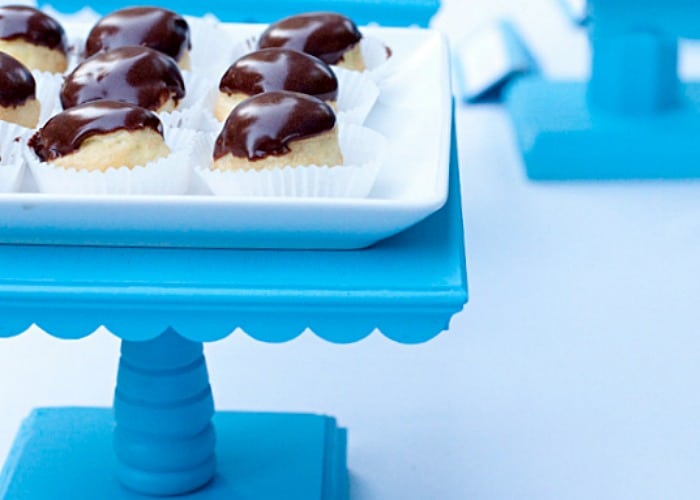
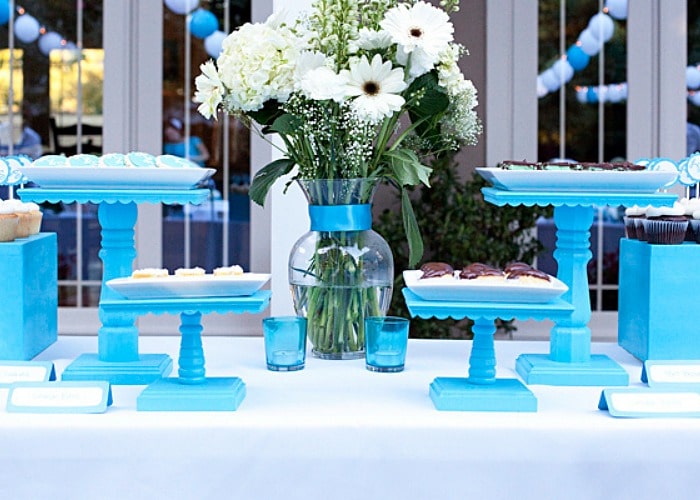
These worked out really well for serving the food at the open house quickly. We didn’t have to bring the whole stand inside to refill it, we just exchanged the almost empty plates with some full plates from the kitchen.

And these cake stands are definitely getting some good use around here! They got spray painted black/orange for Halloween, red for Christmas and Valentines, pastels at Easter…. we are using them again and again!
Ahh, the possibilities!
Check out more “Project Wedding” posts from Bee in Our Bonnet.
Love this crafty idea? Check out some of our other favorite tutorials!
Original article and pictures take www.somewhatsimple.com site
Комментариев нет:
Отправить комментарий